Note
This post was update on November 30th in order to accomodate the 0.8.0 breaking changes
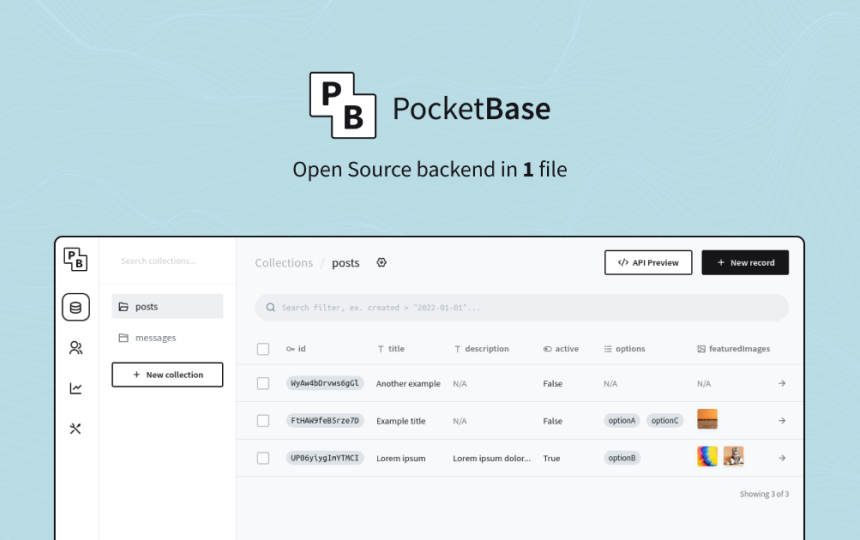
What is Pocketbase?
When working on your next SaaS startup idea you need to make a decision on your back-end. You look around and find two out-of-the-box solutions that you think are fitting for your project: Google's Firebase and Supabase.
Both of these are viable options based on your requirements but they have their own pro's and con's. Firebase can not be self hosted so you have to pay Google based on your usage of the different Firebase services (database, user authentication and file storage etc.) and all your data has to be stored on their servers. Supabase on the other hand offers many of the same functionality and also allows you to self-host the solution to give you complete ownership of your techstack and all the data flowing through it. However, self hosting Supabase is not as easy as it sounds especially if you are not familiar with Docker, PostgreSQL and deploying code.
There is a third alternative: PocketBase
PocketBase is an open Source backend for your next SaaS and Mobile app in 1 file. It's based on SQLite and Go making it small, fast and portable.
It offers out of the box functionally such as:
- Realtime database
- Authentication using both email and password and providers such as Google, Facebook and GitHub
- File storage
- Extendability
Building a minimal app
To showcase how easy it is to work with PocketBase, we will be building a minimal Twitter like app using Vue 3 as the front-end framework. Let's get started!
Create a Vue 3 App
To start, open a terminal window and run the following command to scaffold your Vue 3 project:
npm init vue@latest
Go through the options and choose the following ones:
TypescriptVue RouterPiniaESLintPrettier
✔ Project name: … <your-project-name>
✔ Add TypeScript? … Yes
✔ Add JSX Support? … No
✔ Add Vue Router for Single Page Application development? … Yes
✔ Add Pinia for state management? … Yes
✔ Add Vitest for Unit testing? … No
✔ Add Cypress for both Unit and End-to-End testing? … No
✔ Add ESLint for code quality? … Yes
✔ Add Prettier for code formatting? … Yes

Scaffolding project in ./<your-project-name>...
Done.
For styling we are going with Tailwind. Follow the offical instruction here to add it to your project.
Now run the follwing commands in order to move into your project folder, install the dependencies and start the Vue development server:
> cd <your-project-name>
> npm install
> npm run dev
Great! You can now navigate to http://localhost:5173/ and you should see the Vue 3 start app. Time to move on to PocketBase.
Setup PocketBase
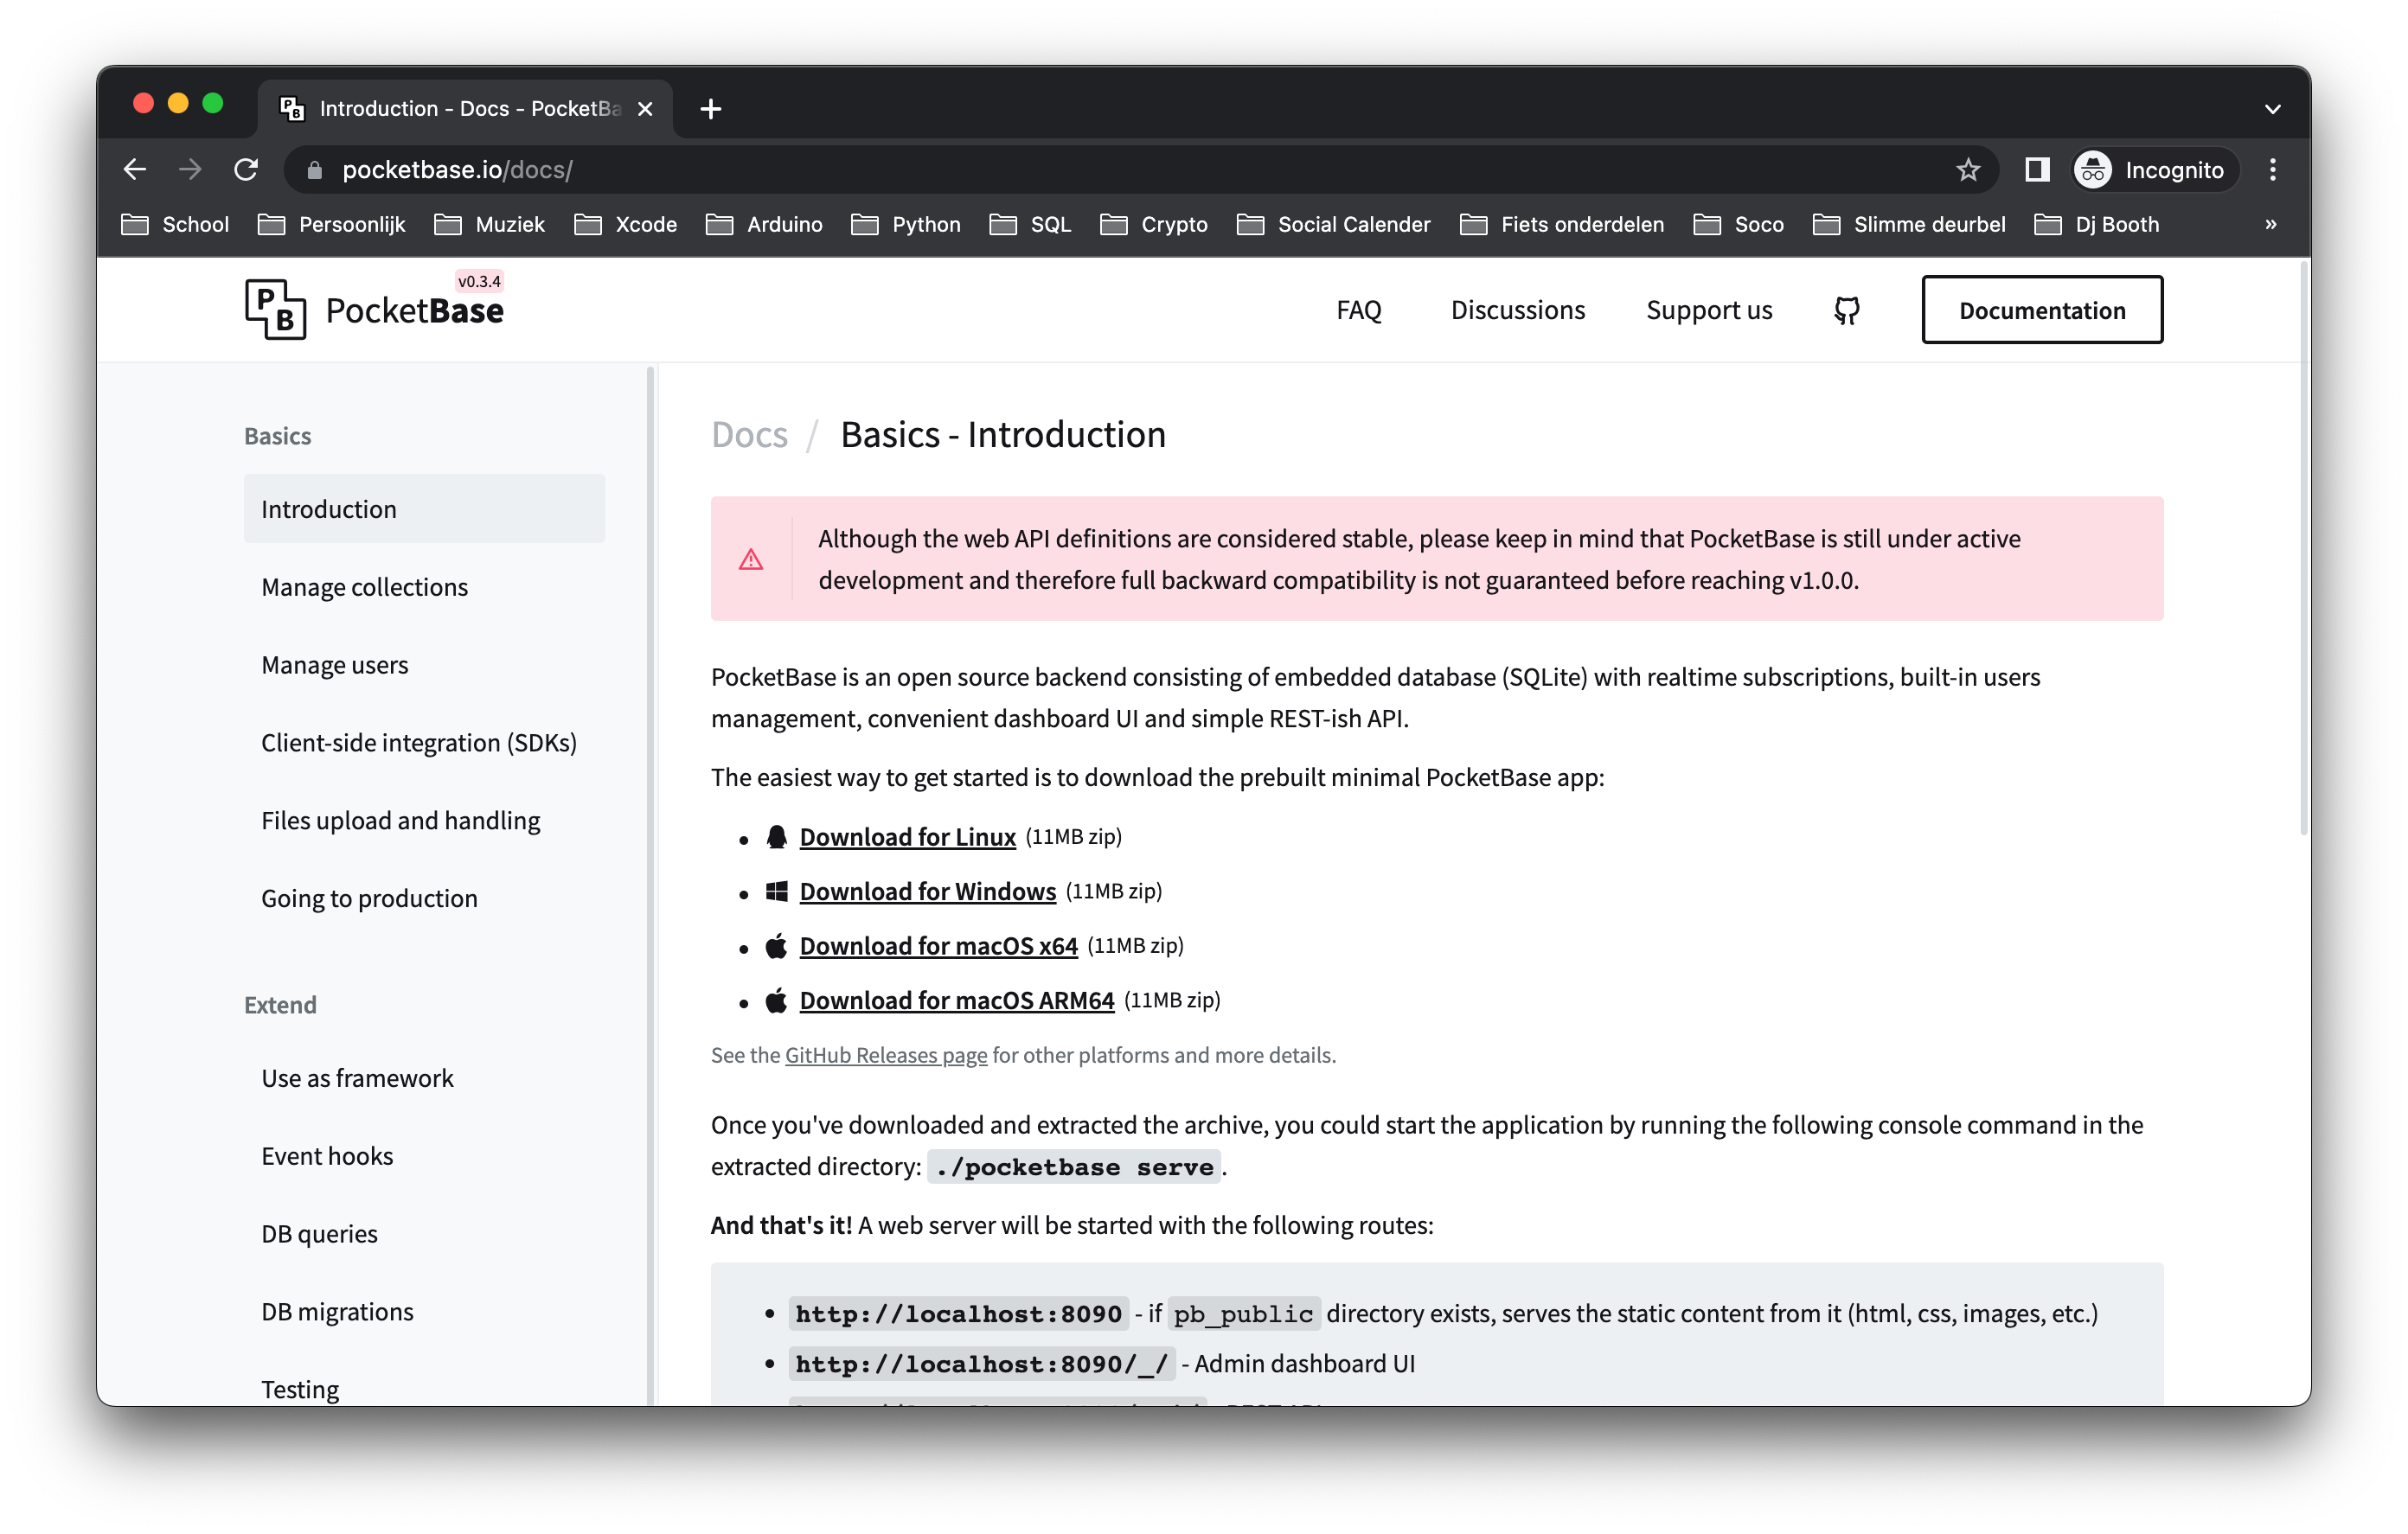
Okay, go to PocketBase's website and download the app that matches your OS. I'm downloading the MacOS version.
After downloading unzip the file into the root of your Vue project. It should look something like this:
.
├── .node_modules
├── pocketbase_0.8.0_darwin_amd64 <-- Pocket base folder
├── public
├── src
├── .env
├── .eslintrc.cjs
├── .gitignore
├── env.d.ts
├── index.html
├── package-lock.json
├── package.json
├── postcss.config.js
├── README.md
├── tailwind.config.js
├── tsconfig.config.json
├── tsconfig.json
└── vite.config.ts
Let's start PocketBase and move to the admin interface. Run the following command to start the server:
cd pocketbase_0.8.0_darwin_amd64/

./pocketbase serve
Now you can navigate to http://localhost:8090/_/ and you should see the following screen where you can create your admin user:

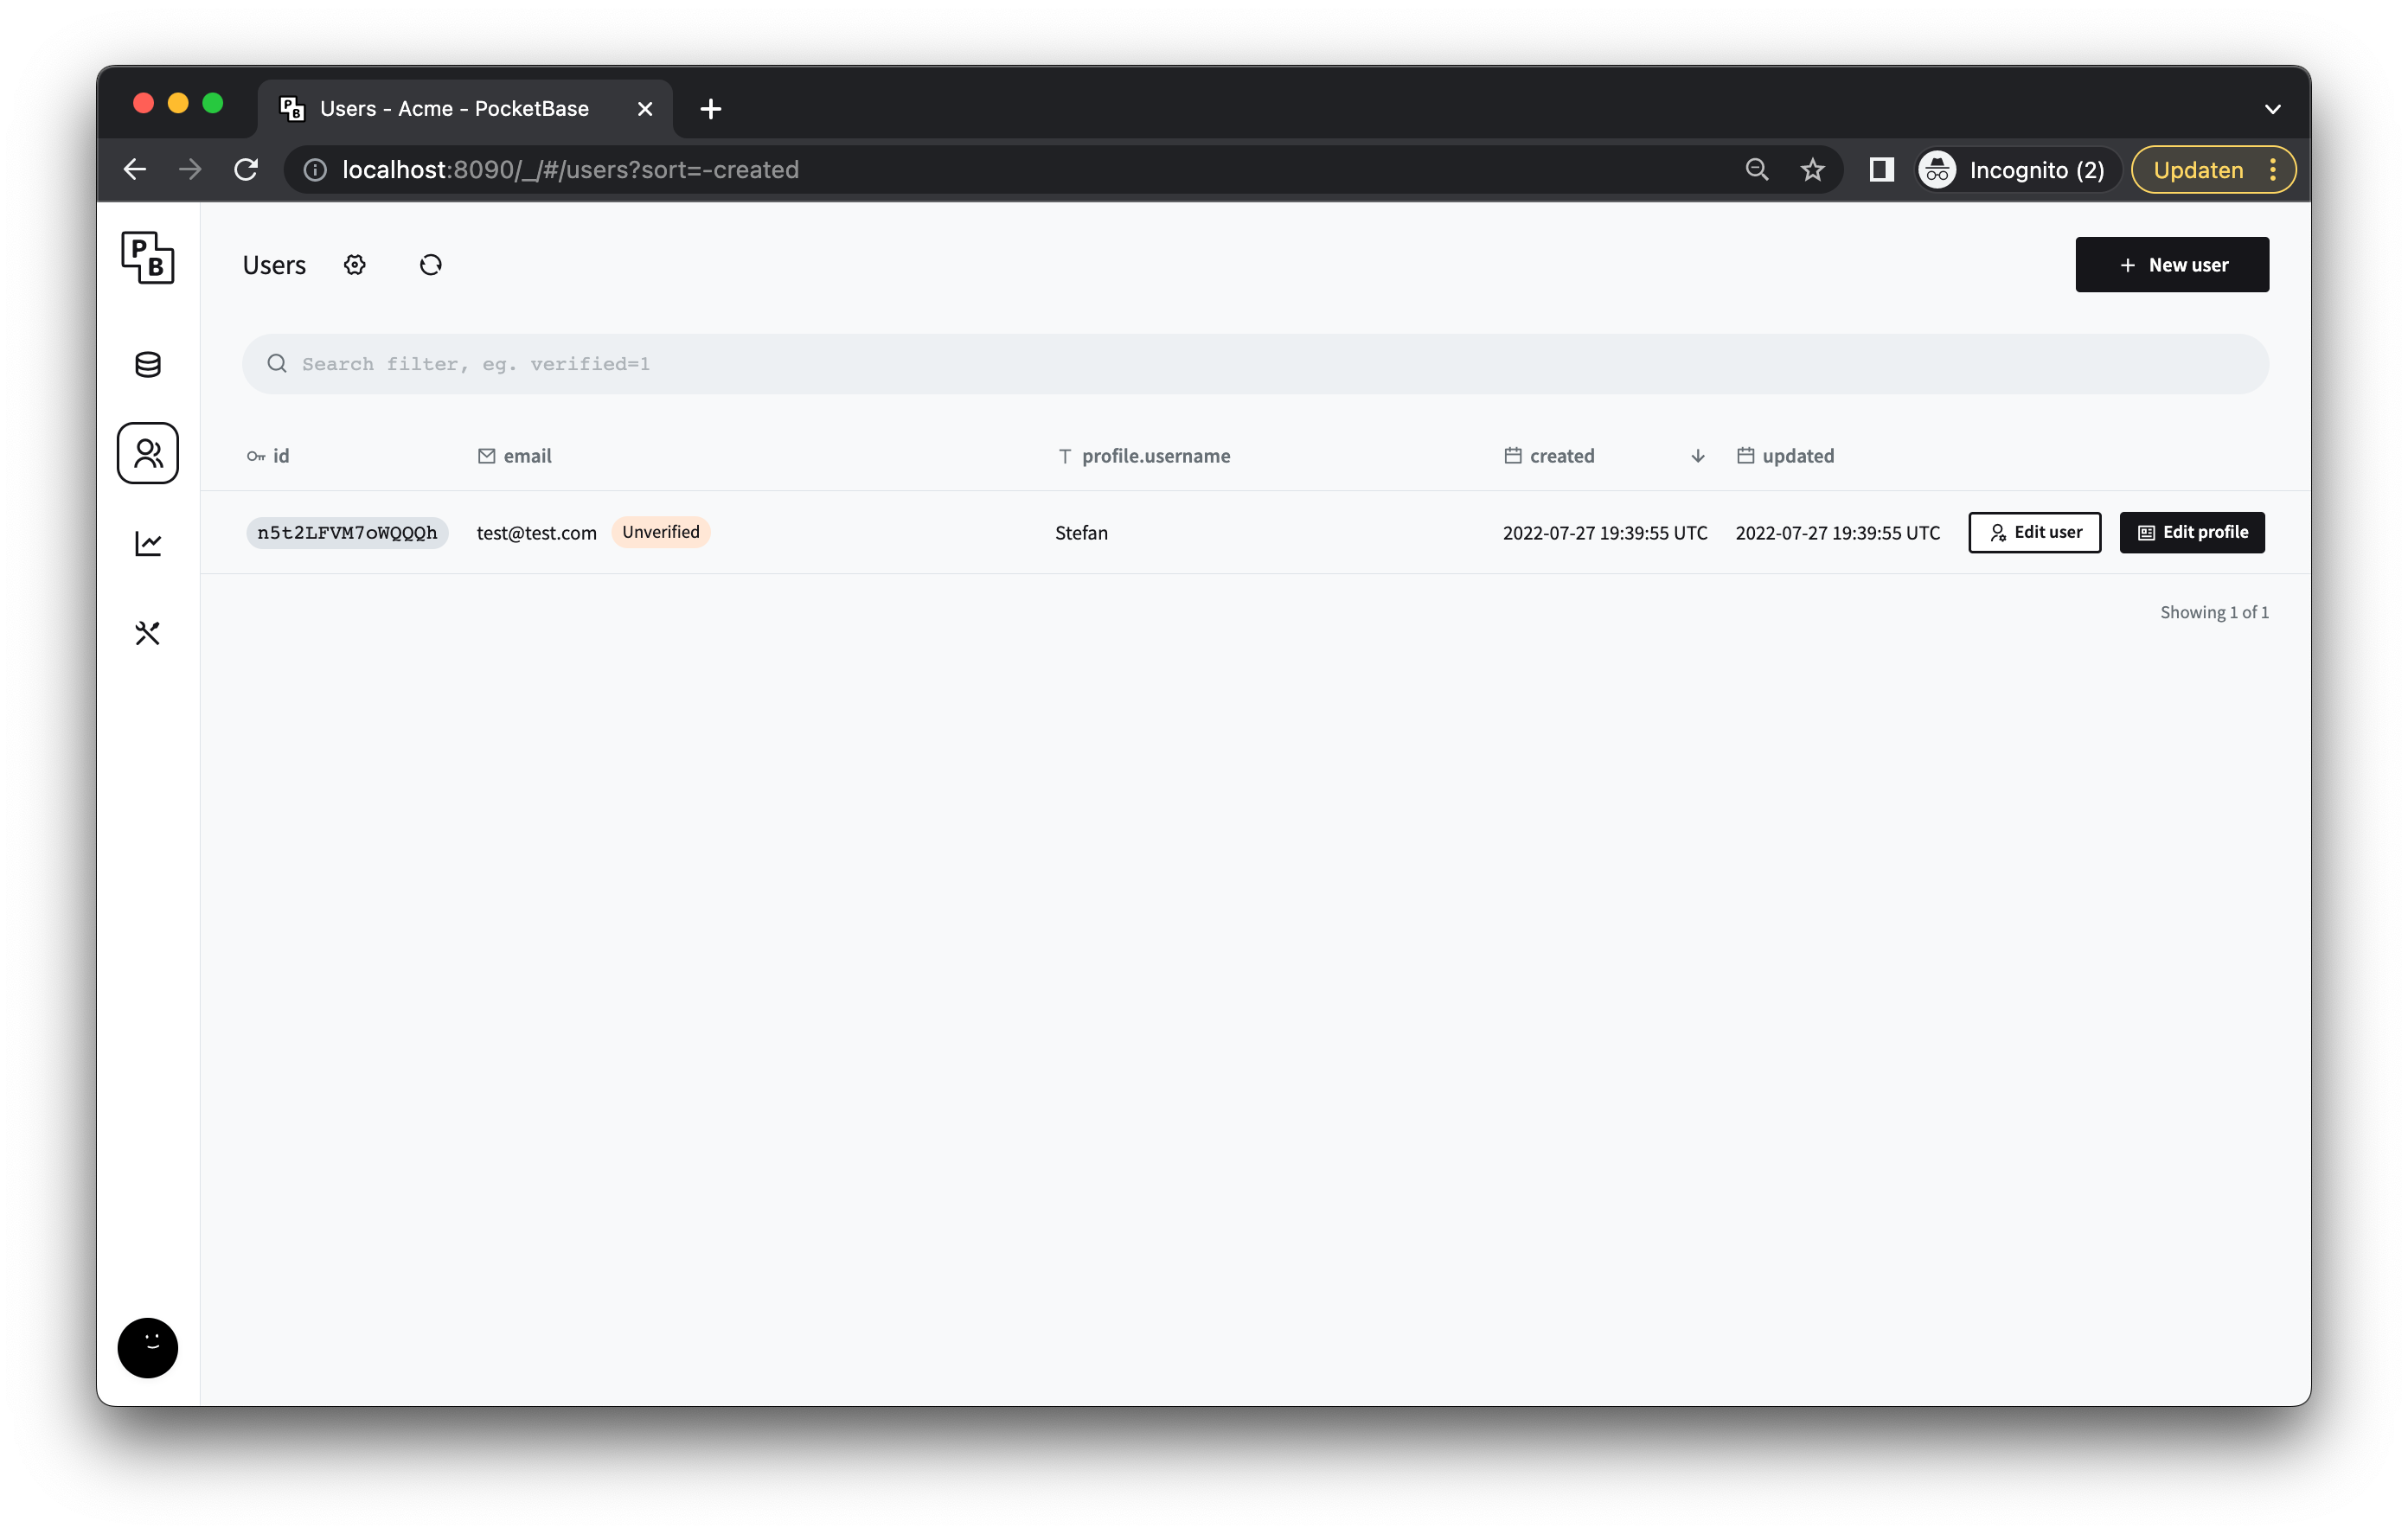
Setup your admin account and click on the create and login button.
Congratulations, PocketBase is ready for use!
Register & Login + Persistent LocalStorage store
To connect our PocketBase back-end to our Vue app, we are gonig to use the official JS SDK. It allows us to easiliy use the built in PocketBase functiontions throughout our app. To start install the the SDK by running the following command in the root folder of the Vue app:
npm install pocketbase --save
Then create a new file called index.ts under src/pocketbase/ and add the following code to import and initialize the SDK:
// Import the PocketBase JS library
import PocketBase from "pocketbase";

// Init the PocketBase instance with the correct URL.
// By setting this in a .env file you can easily switch between development and production environments
const client = new PocketBase(import.meta.env.VITE_POCKETBASE_URL);

export default client;
You'll notive that we are also using an environment variable here to get the PocketBase URL. To make this possible add a file called .env (don't forget the dot in the filename) to the root of your Vue project and add the following line:
VITE_POCKETBASE_URL=http://localhost:8090
Now, since we are using TypeScript we also need to create an injection key so that we can inject the PocketBase SDK into our app so we can use it in our different components. Create a new file called injectionSymbols.ts under src/symbols/. Add the following code:
import type { InjectionKey } from "vue";
import type PocketBase from "pocketbase";

export const pocketBaseSymbol: InjectionKey<PocketBase> = Symbol("PBClient");
Finally, open the main.ts file and add the lines shown below in order to import Pocketbase, the symbol we created and inject it in the app:
import { createApp } from 'vue'
import { createPinia } from 'pinia'

import App from './App.vue'
import router from './router'

import './assets/index.css'

// Import the PocketBase JS library
import client from '@/pocketbase'; <- this line

// Import custom pocketBase type
import { pocketBaseSymbol } from "@/symbols/injectionSymbols" <- this line

const app = createApp(App)

app.use(createPinia())
app.use(router)
app.provide(pocketBaseSymbol, client) <- this line

app.mount('#app')
Now that we have PocketBase working, let's start with the user registration and login functionality. For this example project I'm going to keep it simple and stick with email and password login, but know that PocketBase offers all sort of OAuth2 options:

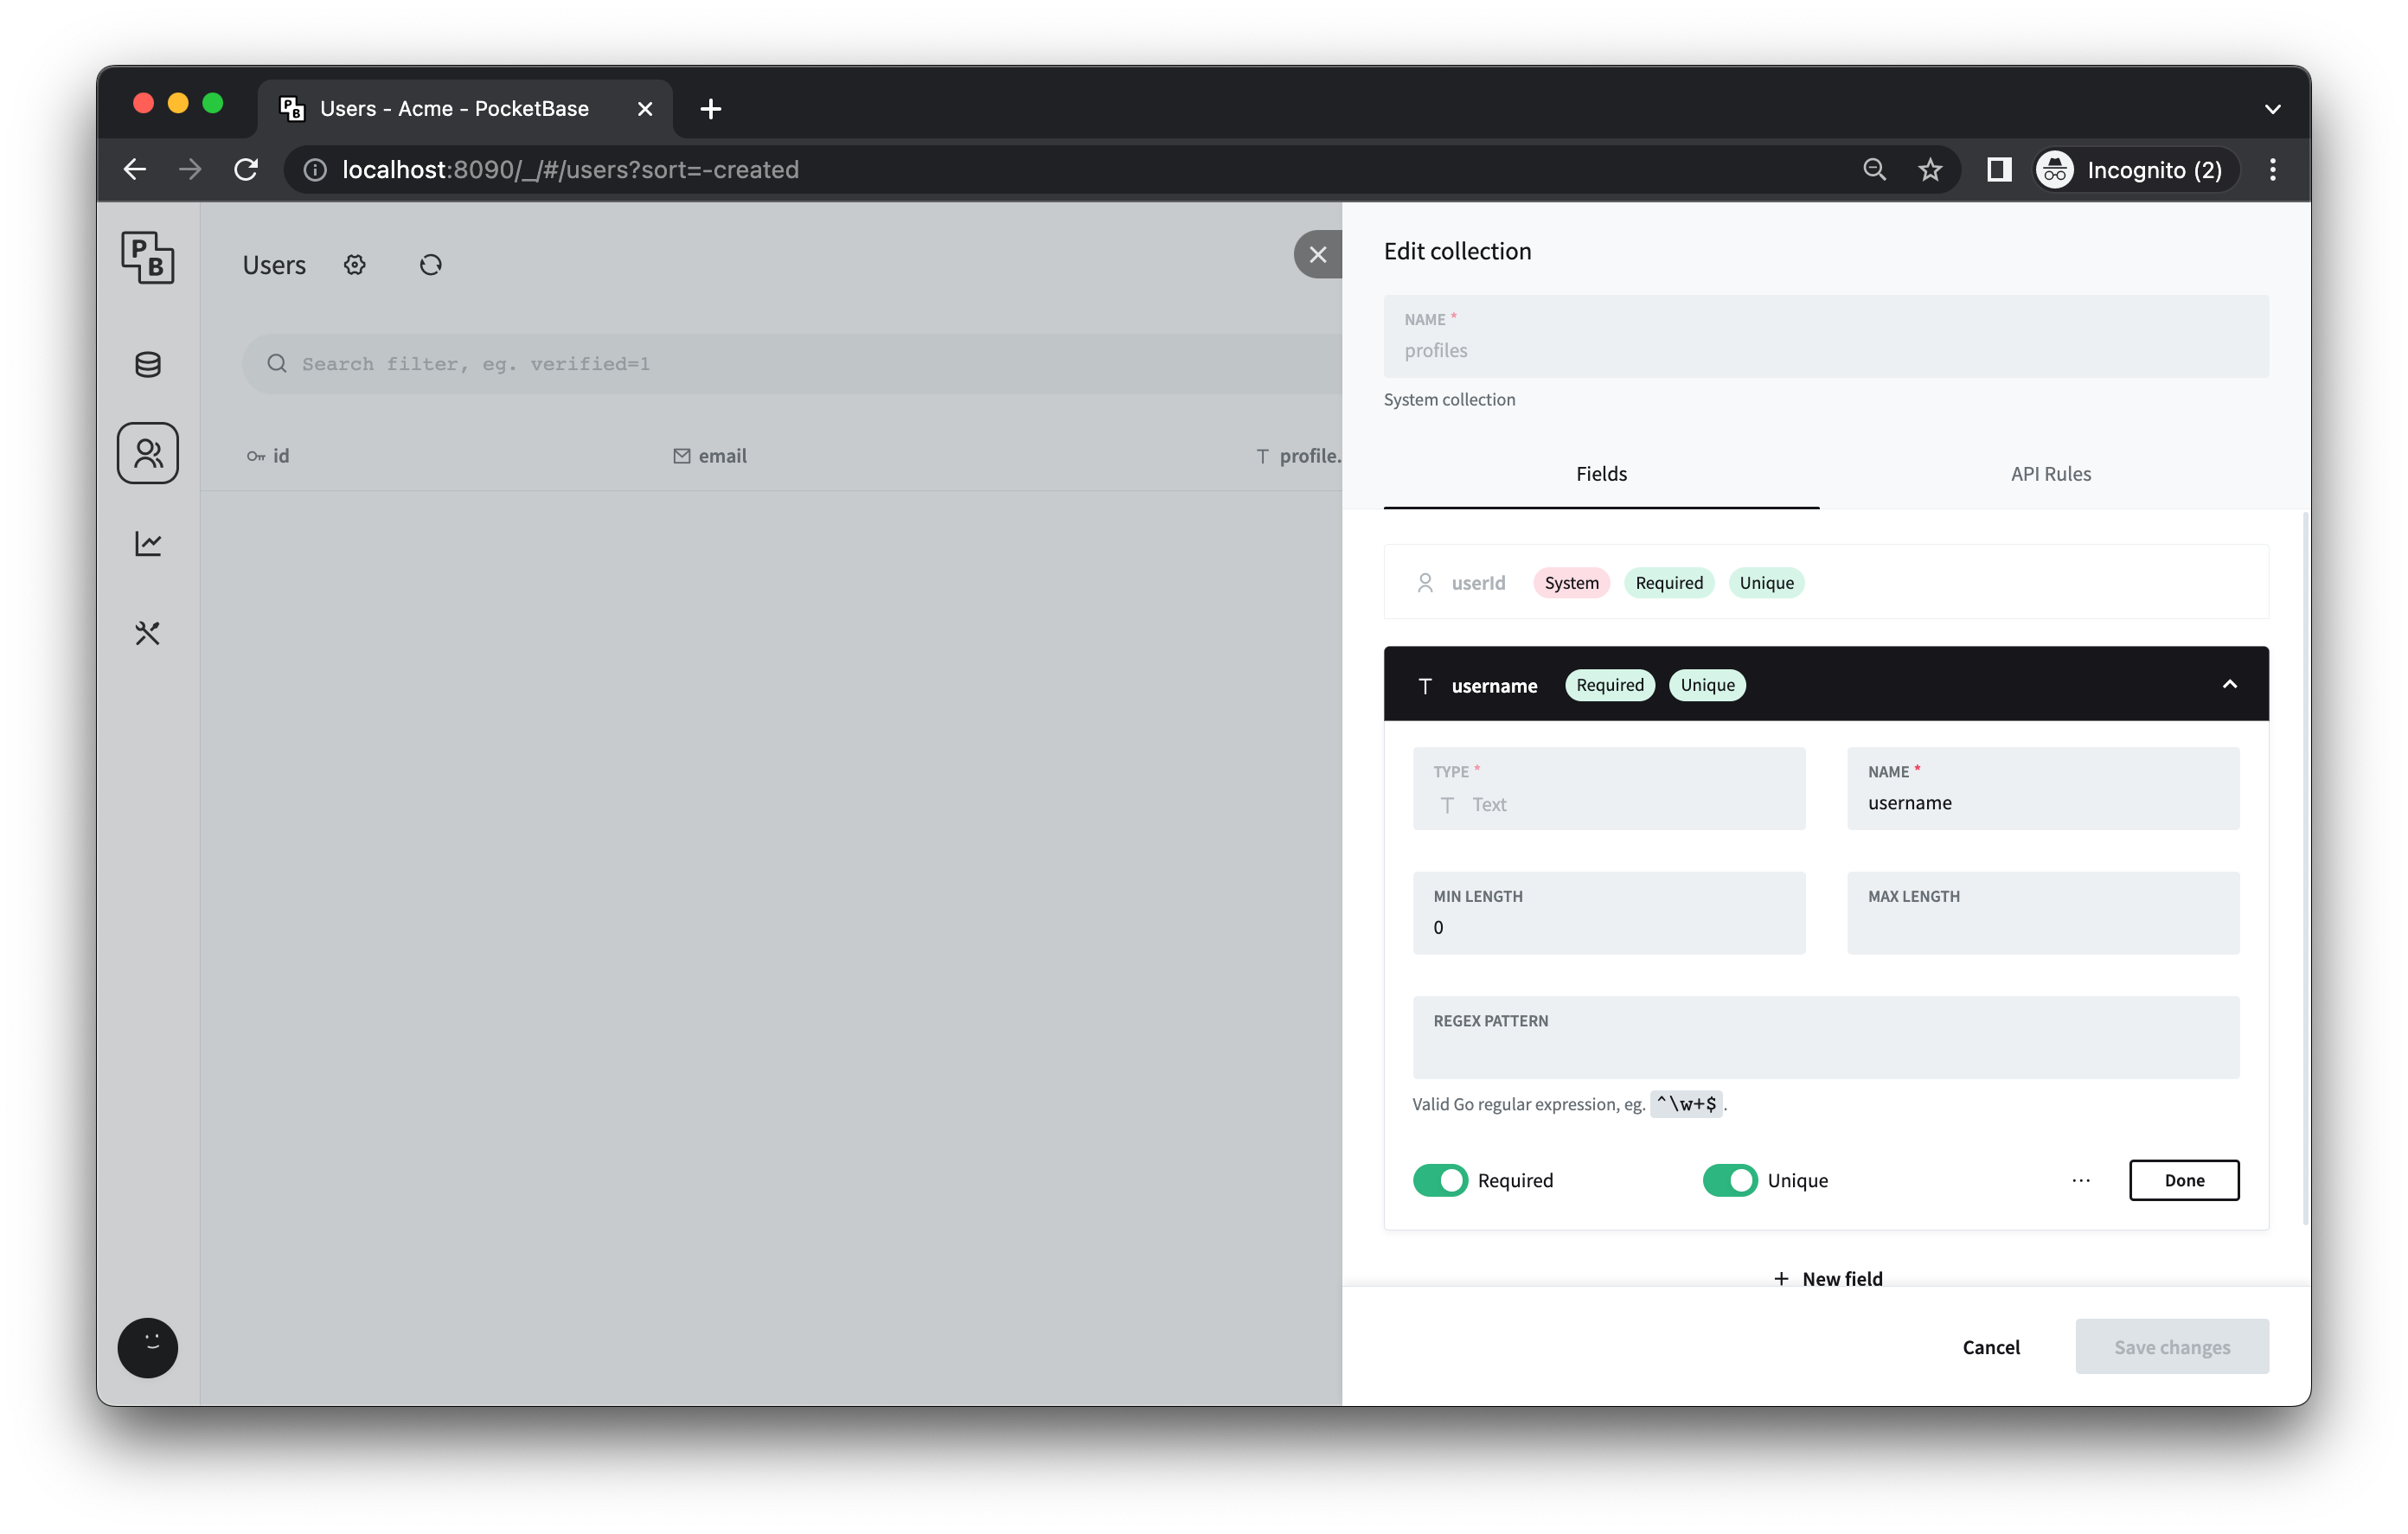
First we need to make sure that we are collecting all the user information we want to have. The email address and password are standard fields we don't have to worry about, but we also want to display a username. PocketBase sets a name and avatar field, but let's delete those. Instead we create a new field called username, make it required and unique.
Next, we want to create a new page with a register component and a login component. First, create a new file in the Views folder and call it HomeView.vue. This will be the first page someone lands on:
<script setup lang="ts">
import LoginComponent from "@/components/LoginComponent.vue";
import RegisterComponent from "@/components/RegisterComponent.vue";
</script>

<template>
    <div>
        <h1 class="mb-12 text-2xl">Login page</h1>
        <div class="grid grid-cols-1 md:grid-cols-2 gap-4">
            <div>
                <LoginComponent />
            </div>
            <div>
                <RegisterComponent />
            </div>
        </div>
    </div>
</template>
Next create a new component called RegisterComponent.vue. This will allow anyone to create a new account for our app:
<script setup lang="ts">
import { inject, ref } from "vue";
import { pocketBaseSymbol } from "@/symbols/injectionSymbols";
import { useUserStore } from "@/stores/user";
import { useRouter } from "vue-router";

// Inject the PocketBase client
const $pb = inject(pocketBaseSymbol);

// Init the store
const userStore = useUserStore();

// Router composable
const router = useRouter();

// Reactive variables
const email = ref("");
const username = ref("");
const password = ref("");
const passwordConfirm = ref("");

// Function to create a new user
const createUser = async () => {
    try {
        if (validateInput()) {
            // Create new user
            const user = await $pb?.collection("users").create({
                username: username.value,
                email: email.value,
                password: password.value,
                passwordConfirm: passwordConfirm.value
            });
            if (user) {
                // Authenticate the user in order to set the username
                await authUser();

                // After succesfull user registration, redirect to dashboard
                router.push({ path: "/dashboard" });
            } else {
                console.log("Error");
            }
        } else {
            alert("Password doesn't match");
        }
    } catch (error) {
        console.log(error);
    }
};

// Function to authenticate the user based on email and password
const authUser = async () => {
    try {
        // Authenticate the user via email and password
        const userData = await $pb
            ?.collection("users")
            .authWithPassword(email.value, password.value);
        if (userData) {
            userStore.userID = userData.record.id;
            userStore.username = userData.record.profile?.username;
            userStore.userProfileID = userData.record.profile?.id!;
            router.push({ path: "/dashboard" });
        }
    } catch (error) {
        console.log(error);
    }
};

// Simple utility function to validate input. Easiliy extendable with additional checks if needed
const validateInput = () => {
    if (password.value !== passwordConfirm.value) {
        return false;
    } else {
        return true;
    }
};
</script>

<template>
    <h2 class="text-2xl font-bold">Register</h2>
    <form @submit.prevent="createUser">
        <div class="grid grid-cols-1 gap-6">
            <label class="block">
                <span>Username</span>
                <input type="text" class="mt-1 block w-full" v-model="username" />
            </label>
            <label class="block">
                <span>Email</span>
                <input type="email" class="mt-1 block w-full" v-model="email" />
            </label>
            <label class="block">
                <span>Password</span>
                <input type="password" class="mt-1 block w-full" v-model="password" />
            </label>
            <label class="block">
                <span>Repeat Password</span>
                <input
                    type="password"
                    class="mt-1 block w-full"
                    v-model="passwordConfirm"
                />
            </label>
        </div>
        <button
            type="submit"
            class="mt-4 text-white desktop-xl:text-2xl bg-black px-4 py-2 border-2 rounded border-black hover:bg-white dark:hover:bg-main-dark-bg hover:text-black"
        >
            Sign Up
        </button>
    </form>
</template>
This is quite a lot of code but we can break it down in three pieces:
- The
createUserfunction takes the input from the register form and uses it to create the account for the user. It also uses thevalidateInputfunction in order to ensure that the passwords match in both password fields. - If the user has been successfully created the
authUserfunction is called. This is necessary because just registering a user will not return a valid login token. - Finally the user is redirected to the
/dashboardpage.
The code is pretty basic as you can see. I would not recommend using it as is in a production environment. At the very least the error handling needs to be more robust. But as an example this will work just fine.
The LoginComponent.vue file is very similar to the RegisterComponent.vue one. The only major difference is that in the login component the createUser function is not is called, since this is up to the register component:
<script setup lang="ts">
import { useUserStore } from "@/stores/user";
import { pocketBaseSymbol } from "@/symbols/injectionSymbols";
import { inject, ref } from "vue";
import { useRouter } from "vue-router";

// Inject the PocketBase client
const $pb = inject(pocketBaseSymbol);

// Init the store
const userStore = useUserStore();

// Router composable
const router = useRouter();

// Local reactive variables
const email = ref("");
const password = ref("");

// Function to authenticate the user based on email and password
const authUser = async () => {
    try {
        // Authenticate the user via email and password
        const userData = await $pb
            ?.collection("users")
            .authWithPassword(email.value, password.value);

        if (userData) {
            userStore.userID = userData.record.id;
            userStore.username = userData.record.profile?.username;
            userStore.userProfileID = userData.record.profile?.id!;
            router.push({ path: "/dashboard" });
        }
    } catch (error) {
        console.log(error);
    }
};
</script>

<template>
    <h2 class="text-2xl font-bold">Login</h2>
    <form @submit.prevent="authUser">
        <div class="grid grid-cols-1 gap-6">
            <label class="block">
                <span>Email</span>
                <input type="email" class="mt-1 block w-full" v-model="email" />
            </label>
            <label class="block">
                <span>Password</span>
                <input type="password" class="mt-1 block w-full" v-model="password" />
            </label>
        </div>
        <button
            type="submit"
            class="mt-4 text-white desktop-xl:text-2xl bg-black px-4 py-2 border-2 rounded border-black hover:bg-white dark:hover:bg-main-dark-bg hover:text-black"
        >
            Login
        </button>
    </form>
</template>
Don't forget to add your new HomeView.vue page to your router file:
const router = createRouter({
    history: createWebHistory(import.meta.env.BASE_URL),
    routes: [
        {
            path: '/',
            name: 'home',
            // route level code-splitting
            // this generates a separate chunk (About.[hash].js) for this route
            // which is lazy-loaded when the route is visited.
            component: () => import('../views/HomeView.vue')
        },

// Rest of the file omitted for brevity
You'll notice that we are using the userStore in both the components in order to save some user information so we can use it in other components later. This is a global state powerd by Pinia, which you can add to your project by creating a file called user.ts to src/stores/ and adding the following code:
import { defineStore } from "pinia";
import { ref } from "vue";
import { useLocalStorage } from "@vueuse/core";

export const useUserStore = defineStore("user", () => {
    // State variable
    // Using the useLocalStorage composable provided by VueUse in order to persist state during page reloads
    const userID = ref(useLocalStorage("userID", ""));
    const username = ref(useLocalStorage("username", ""));
    const userProfileID = ref(useLocalStorage("userProfileID", ""));

    // Actions
    function clear() {
        userID.value = "";
        username.value = "";
        userProfileID.value = "";
    }

    return { userID, username, userProfileID, clear };
});
You can now register new users and login, but it won't redirect you anywhere since the expected dashboard page does not exist yet. Let's quickly resolve that. First, create a new view called DashboardView.vue and add the following placeholder code for now:
<script setup lang="ts"></script>

<template>
    <div>
        <h1>Dashboard</h1>
    </div>
</template>
and of course don't forget to add the new dashboard view to your router file:
import client from "@/pocketbase";
import { createRouter, createWebHistory } from "vue-router";

const router = createRouter({
    history: createWebHistory(import.meta.env.BASE_URL),
    routes: [
        {
            path: "/",
            name: "home",
            // route level code-splitting
            // this generates a separate chunk (About.[hash].js) for this route
            // which is lazy-loaded when the route is visited.
            component: () => import("../views/HomeView.vue")
        },
        {
            path: "/dashboard",
            name: "dashboard",
            meta: { requiresAuth: true },
            // route level code-splitting
            // this generates a separate chunk (About.[hash].js) for this route
            // which is lazy-loaded when the route is visited.
            component: () => import("../views/DashboardView.vue")
        }
    ]
});

router.beforeEach((to, from) => {
    // Init the store within the beforeEach function as per the documentation:
    // https://pinia.vuejs.org/core-concepts/outside-component-usage.html#single-page-applications
    if (to.meta.requiresAuth && !client?.authStore.token) {
        return {
            path: "/"
        };
    }
});

export default router;
You might notice something different about the router code above. Namely, the meta object with the requiresAuth attribute. This ensures that someone can't just go the the /dashboard page without logging in. It work together with the code at the bottom, which uses the beforeEach function to check if any given route has the requiresAuth attribute and if the user has a PocketBase token. For now we are going to assume that anyone who has a token has loggedin successfully. Be aware that in a production environment you need to think about invalidating tokens.
Finally let's add some navigation with additional checks based on the loggedin status of the user. Create a new component called navbarComponent.vue and add the following code:
<script setup lang="ts">
import { useUserStore } from "@/stores/user";
import { pocketBaseSymbol } from "@/symbols/injectionSymbols";
import { inject } from "vue";
import { useRouter } from "vue-router";

// Init the store
const userStore = useUserStore();

// Inject the PocketBase client
const $pb = inject(pocketBaseSymbol);

// Router composable
const router = useRouter();

const logoutUser = () => {
    // Manual reset because Pinia using the composition API does not support the $reset function
    userStore.clear();
    // Remove the PocketBase token
    $pb?.authStore.clear();
    // Redirect to the login page
    router.push({ path: "/" });
};
</script>

<template>
    <nav
        class="sticky top-0 flex flex-wrap items-center justify-between py-3 bg-white z-10"
    >
        <div
            class="w-full relative flex justify-between py-1 lg:w-auto lg:static lg:block lg:justify-start"
        >
            <span aria-current="page" class="text-3xl font-extrabold">
                Pocketbase & Vue
            </span>
            <button type="button" class="lg:hidden">
                <svg
                    fill="none"
                    stroke-linecap="round"
                    stroke-linejoin="round"
                    stroke-width="2"
                    viewBox="0 0 24 24"
                    stroke="currentColor"
                    class="h-8 w-8 fill-current text-black"
                >
                    <path d="M4 6h16M4 12h16M4 18h16"></path>
                </svg>
            </button>
        </div>
        <div
            class="lg:relative text-xl font-medium lg:flex lg:flex-grow items-center hidden"
        >
            <ul class="flex flex-row list-none ml-auto">
                <li v-if="$pb?.authStore.token" class="pr-5">
                    <router-link to="/feed"> Feed </router-link>
                </li>
                <li v-if="$pb?.authStore.token" class="pr-5">
                    <router-link to="/dashboard"> Dashboard </router-link>
                </li>
                <li v-if="$pb?.authStore.token" class="pr-5">
                    <span @click="logoutUser"> Logout </span>
                </li>
            </ul>
        </div>
    </nav>
</template>
Okay, that was a lot of code. Finally time to see the results. First run npm run dev in the root folder of your Vue project to start the Vue dev server. Then in another terminal window navigate to your PocketBase folder and run ./pocketbase serve to start the server. Navigate to http://localhost:5173/ and you should see the following page:
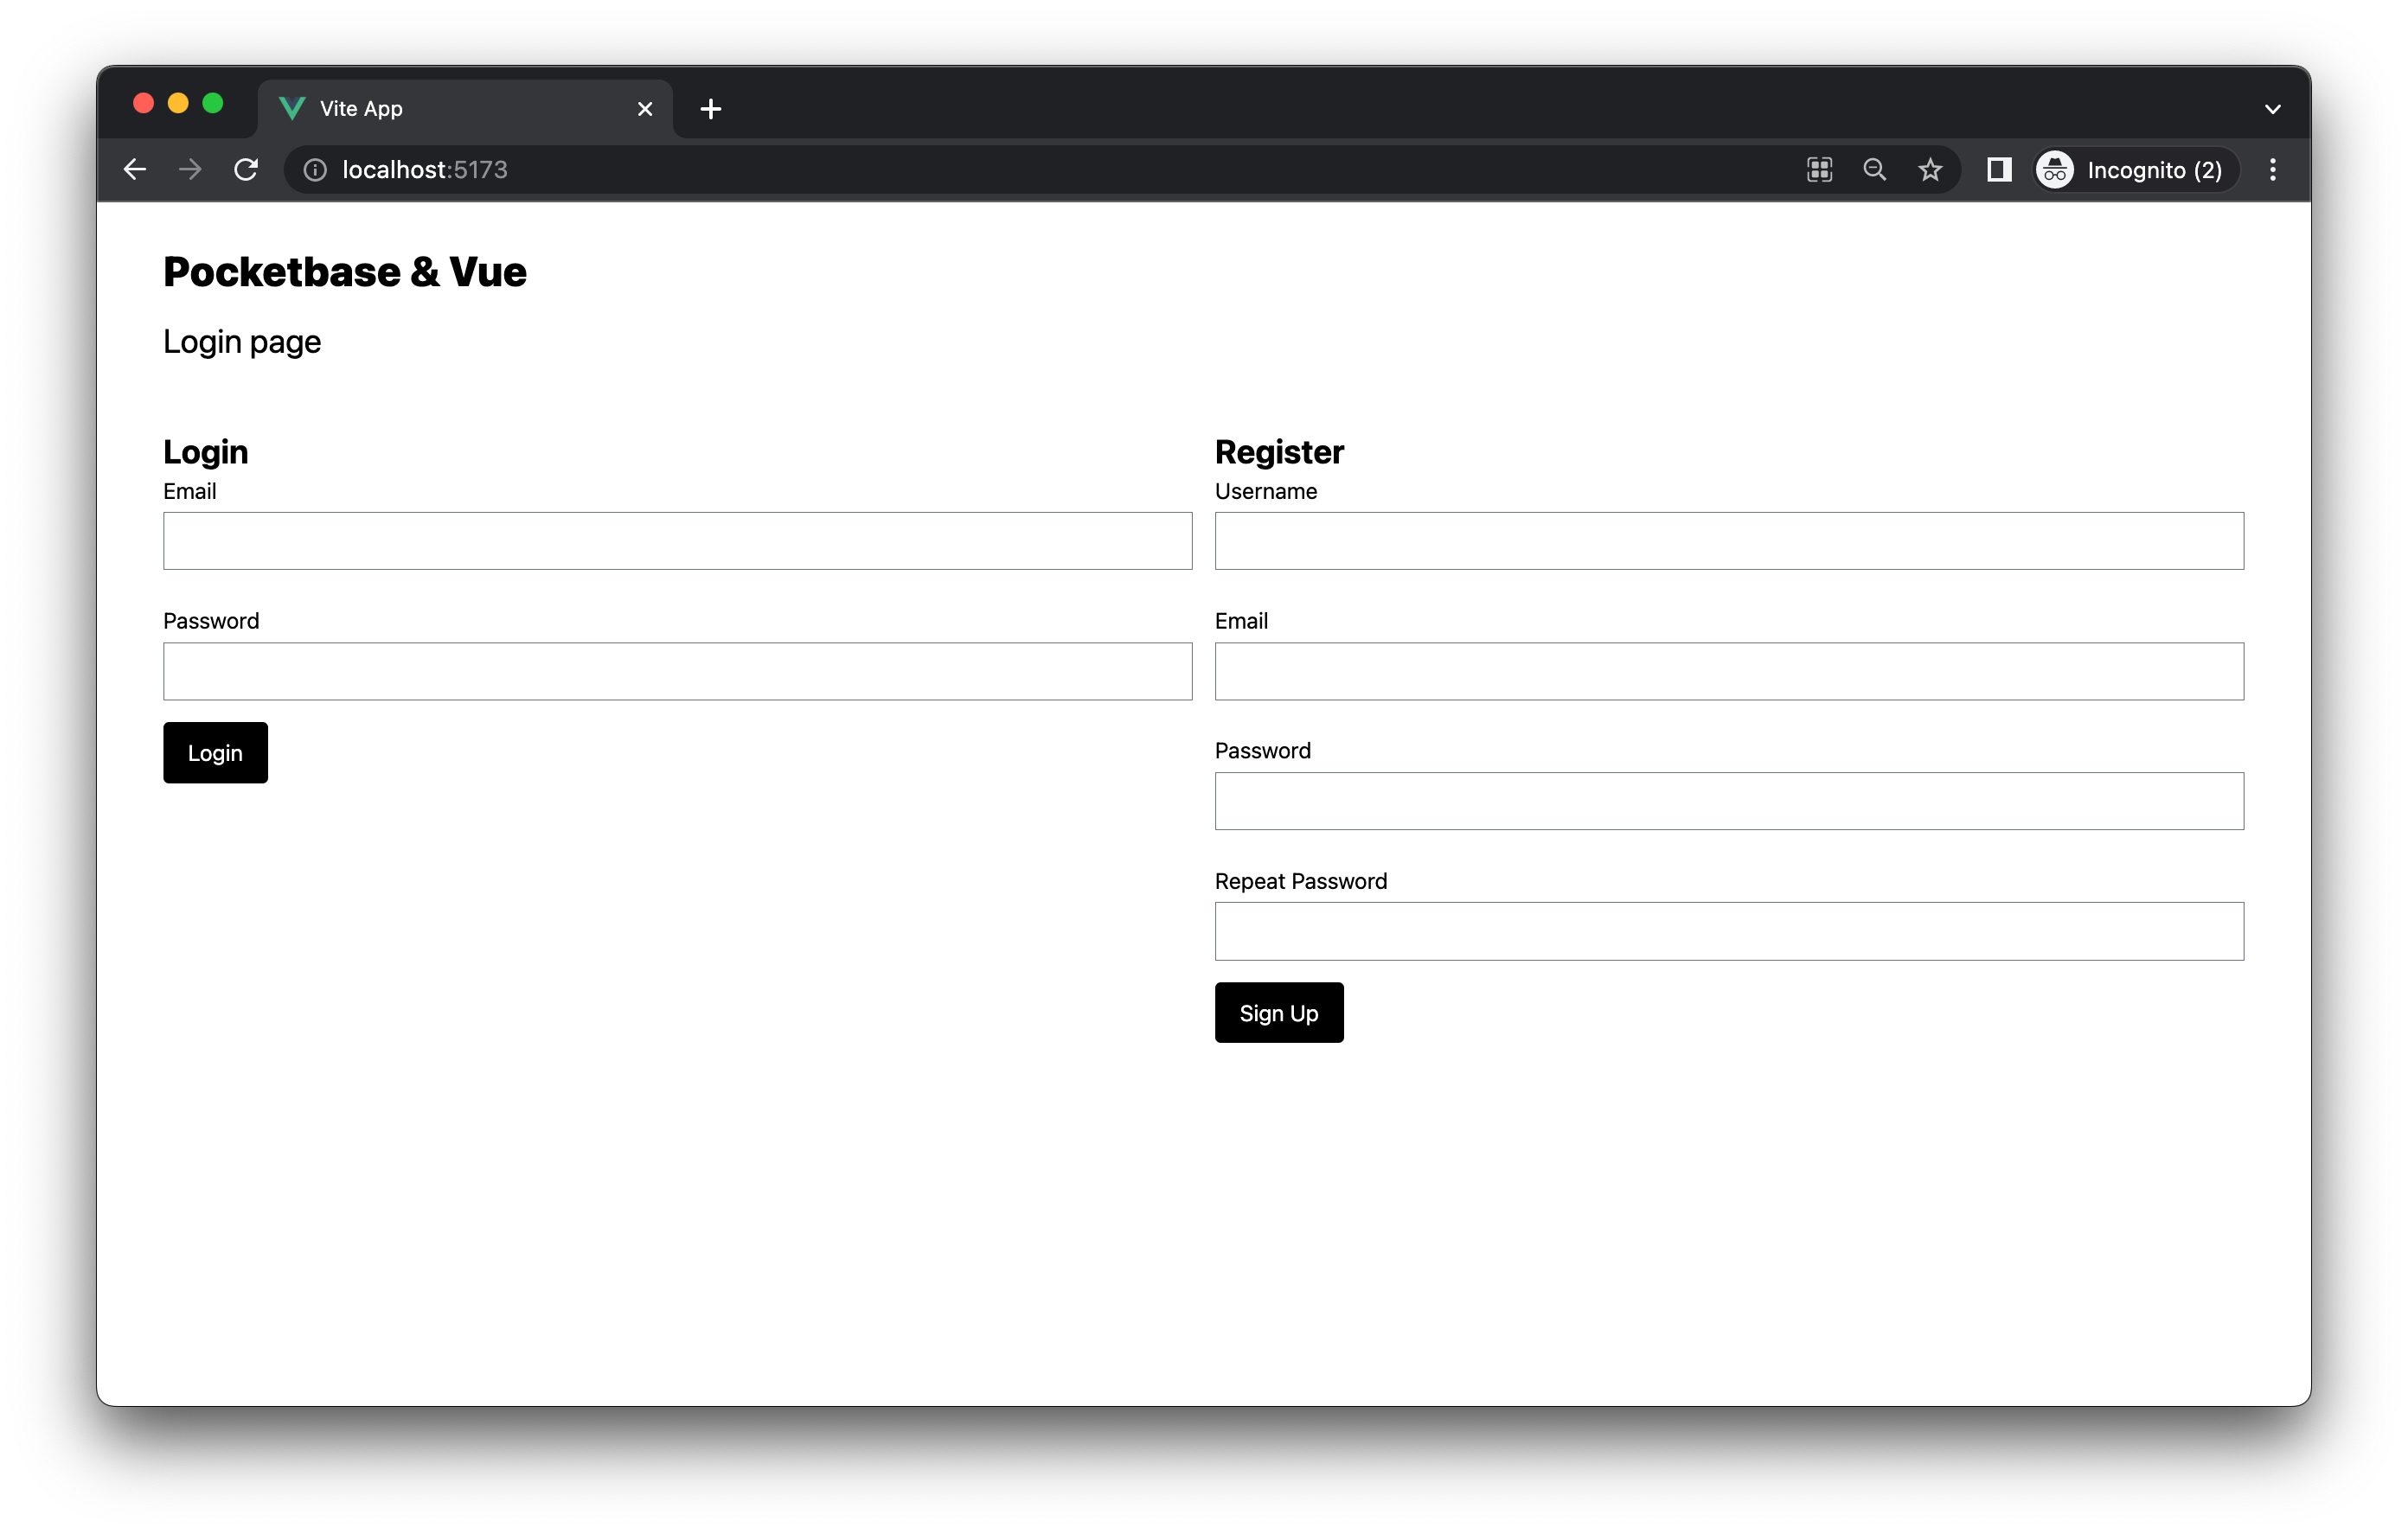
Time to register our very first user. Enter a username, email and a password twice. Hit the Sign Up button and you should end up on the dashboard page.
Congratulations, you can now register users and let them login and logout!
Improve the dashboard
Now that someone can register, login and logout it's time to add some more functionality. Users needs be able to add posts and also see what they have posted in the past. Let's add both of these features to the dashboard.
We are going to split the features up into separate components, then bring them together in our DashboardView.vue file. Let's start with the new post feature. Go to the PocketBase admin panel and click on Collection and then the + New collection button. Add the following fields:
- title
- Type: text
- content
- Type: text
- user (This will be used to relate post to users)
- Type: User
Save your changes and let's move on to the code
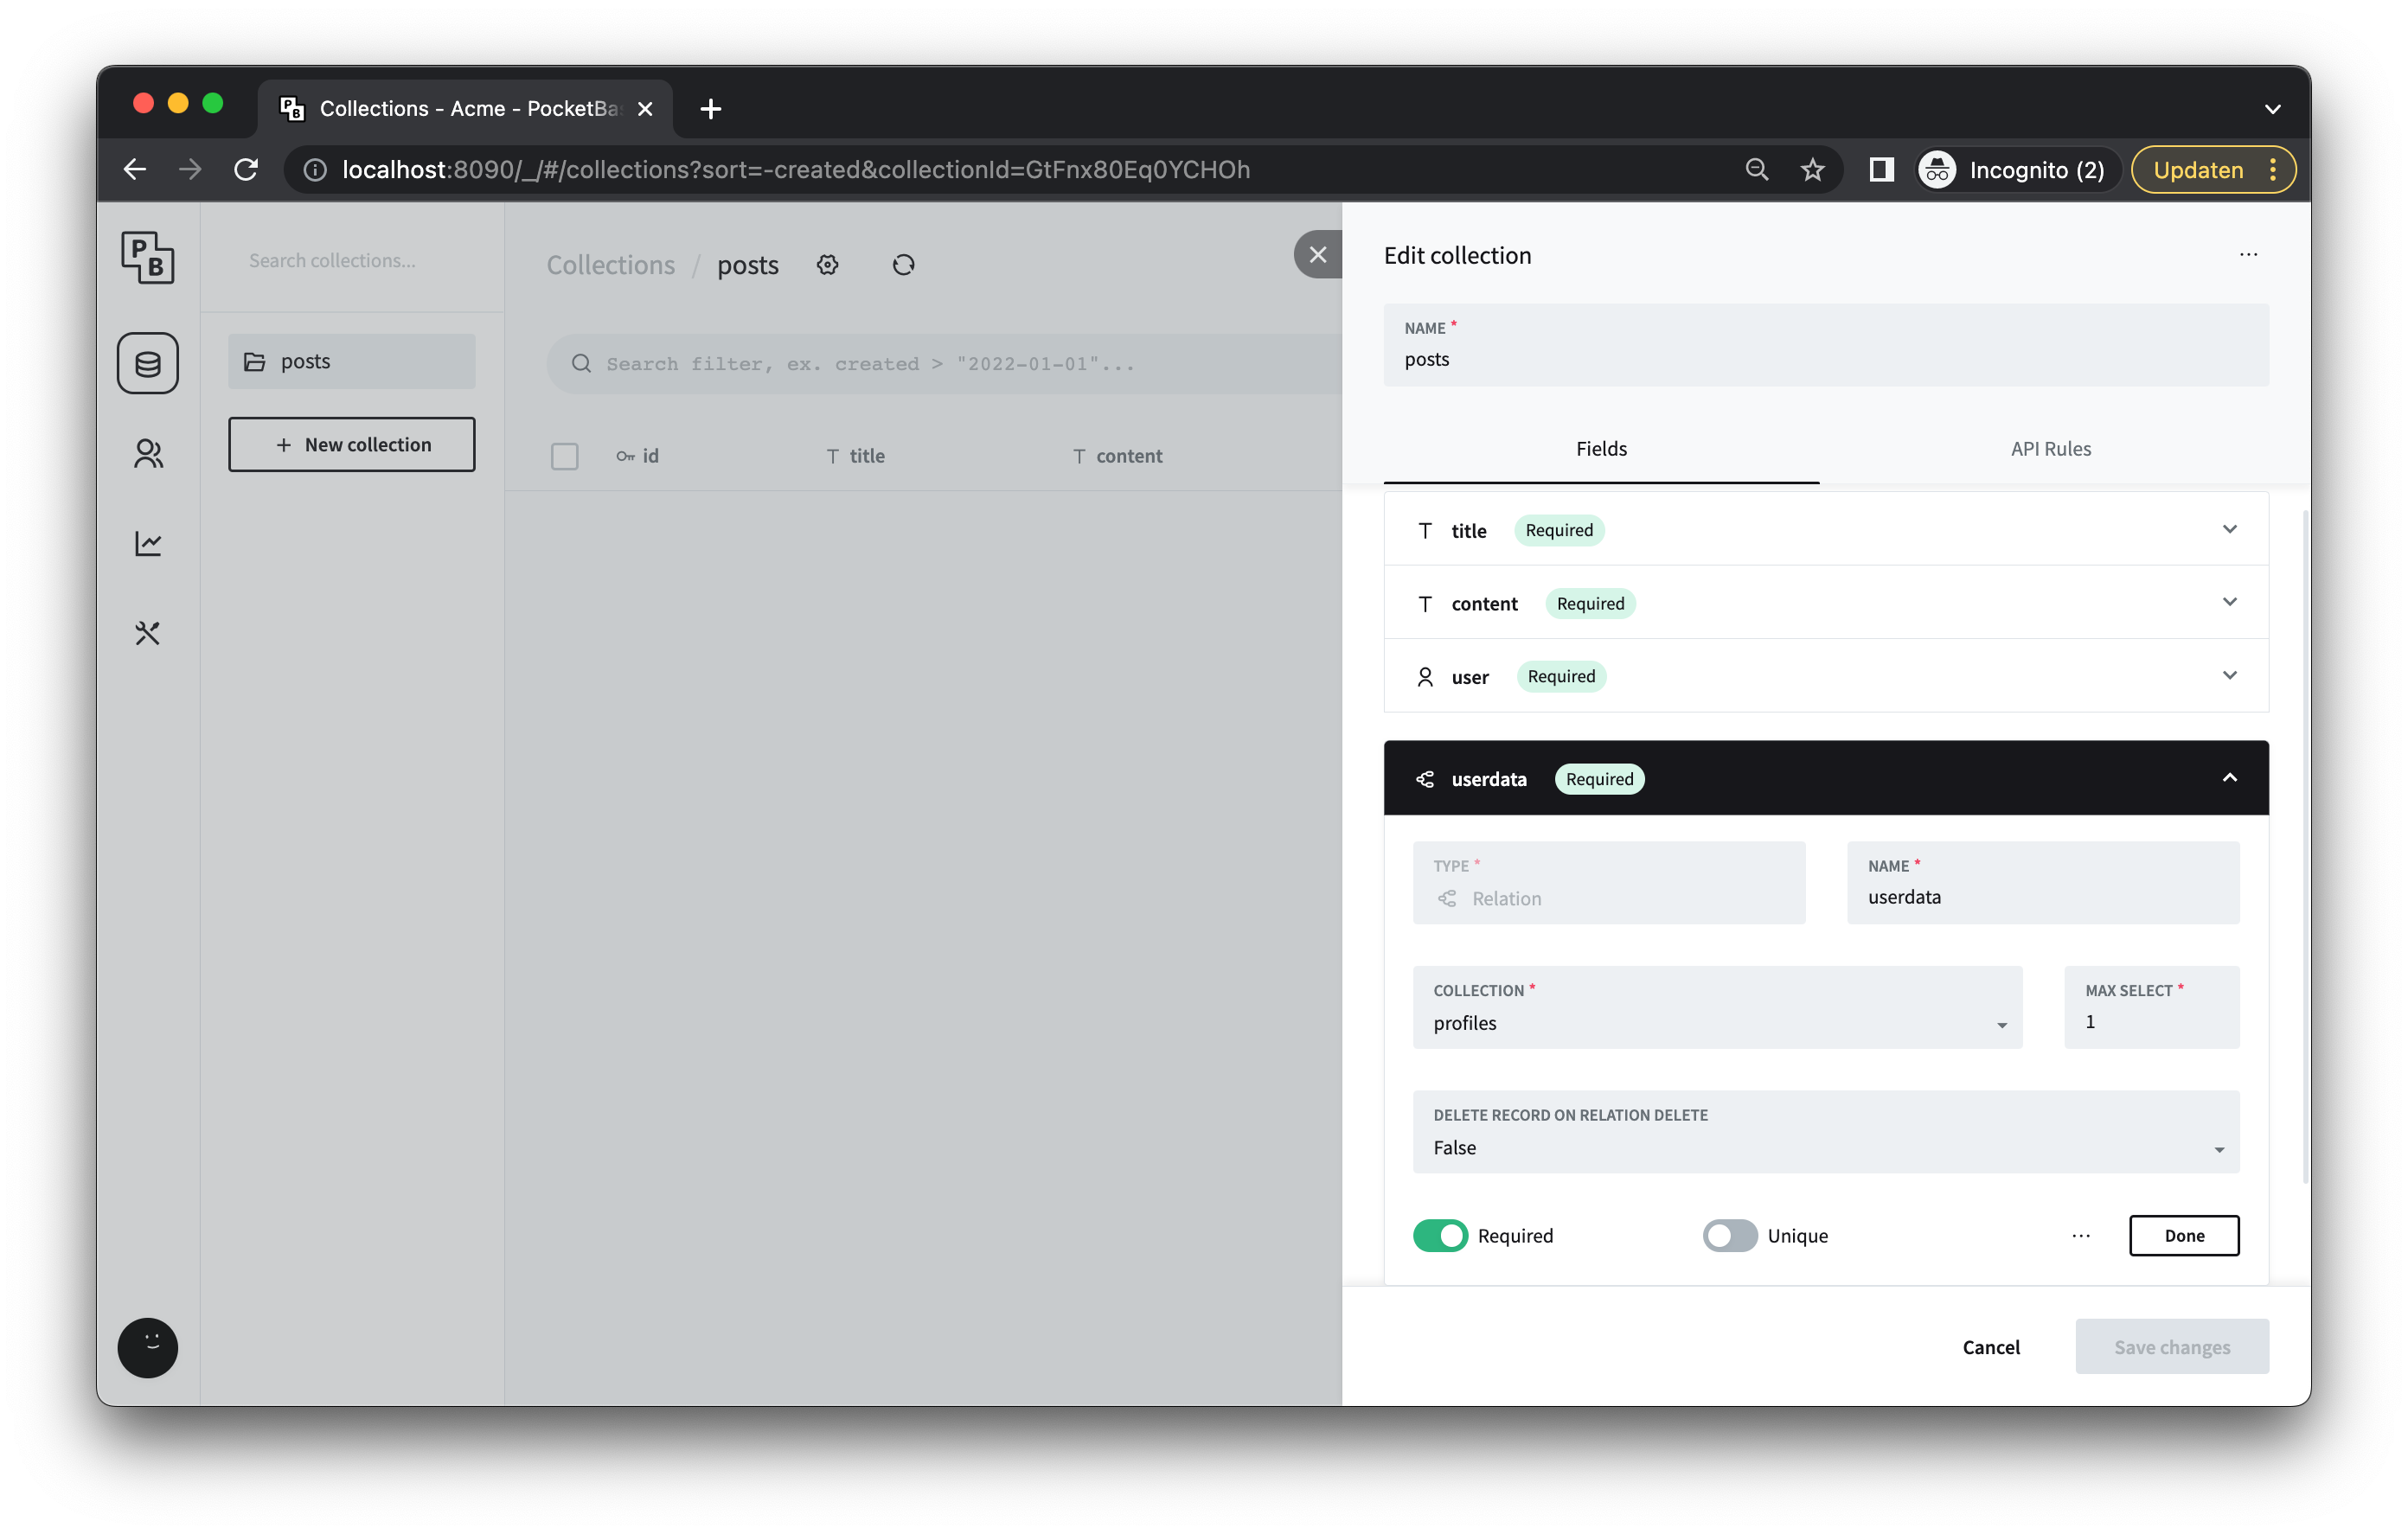
Save your changes and let's move on to the code. Create a new file called NewPostComponent.vue in the components folder and add the following code:
<script setup lang="ts">
import { ref } from "@vue/reactivity";
import { inject } from "@vue/runtime-core";
import { pocketBaseSymbol } from "@/symbols/injectionSymbols";
import { useUserStore } from "@/stores/user";

// Inject the PocketBase client
const $pb = inject(pocketBaseSymbol);

// Init the store
const userStore = useUserStore();

// Init emits
const emit = defineEmits(["newPostCreated"]);

// State
const title = ref("");
const content = ref("");

// Methods
const createPost = async () => {
    try {
        const postPayload = {
            title: title.value,
            content: content.value,
            user: userStore.userID,
            userdata: userStore.userProfileID
        };
        const response = await $pb?.collection("posts").create(postPayload);
        if (response) {
            emit("newPostCreated");
            title.value = "";
            content.value = "";
        }
    } catch (error) {
        console.log(error);
    }
};
</script>

<template>
    <h2 class="text-2xl font-bold">Create new post</h2>
    <form @submit.prevent="createPost">
        <div class="grid grid-cols-1 gap-6">
            <label class="block">
                <span>Title</span>
                <input type="text" class="mt-1 block w-full" v-model="title" />
            </label>
            <label class="block">
                <span>Content</span>
                <textarea class="mt-1 block w-full" v-model="content"></textarea>
            </label>
        </div>
        <button
            type="submit"
            class="mt-4 text-white desktop-xl:text-2xl bg-black px-4 py-2 border-2 rounded border-black hover:bg-white dark:hover:bg-main-dark-bg hover:text-black"
        >
            Submit
        </button>
    </form>
</template>
The code is not too dissimilar to our register and login components. We again have a form where users can enter the title and content of their posts and some logic to send it to PocketBase. The createPost function takes the title and content from the form but also the userID and userProfileID in order to link the post to the correct user. The user information is retrieved from the Pinia store which is populated when someone logs in.
We also let the dashboard page know, where this component will live, that a new post has been created. The dashboard page can then perform any necessary actions such as fetching the post.
Next up we need a component to display an individual post. We can use this to display a post anywhere we want in our app. To start create a new component called IndividualPostComponent.vue and add the following code:
<script setup lang="ts">
const props = defineProps({
    postData: Object
});
</script>

<template>
    <div class="mb-8 p-4 bg-blue-50 rounded">
        <h2 class="text-2xl font-bold">{{ props.postData?.title }}</h2>
        <span class="text-gray-400">{{
            props.postData?.expand.user.username
        }}</span>
        <p>{{ props.postData?.content }}</p>
    </div>
</template>
This component needs surprisingly little code. We define a prop (data that can be passed down from the parent to this component) and use it to get the data needed to display the post.
Let's tie everything together in the DashboardView.vue. Replace the placeholder code you have there now with the following:
<script setup lang="ts">
import NewpostComponent from "@/components/NewPostComponent.vue";
import IndividualPostComponent from "@/components/IndividualPostComponent.vue";
import { useUserStore } from "@/stores/user";
import { pocketBaseSymbol } from "@/symbols/injectionSymbols";
import { inject, onMounted, ref } from "vue";

// Inject the PocketBase client
const $pb = inject(pocketBaseSymbol);

// Init the store
const userStore = useUserStore();

// Local reactive variables
const posts = ref<any[]>([]);

// Get all the user's posts
const getOwnedPostList = async () => {
    try {
        const list = await $pb?.collection("posts").getFullList(200, {
            filter: `user = '${userStore.userID}'`,
            expand: "user"
        });
        if (list) {
            posts.value = list;
        }
    } catch (error) {
        console.log(error);
    }
};

onMounted(() => {
    getOwnedPostList();
});
</script>

<template>
    <div>
        <h1 class="mb-3 text-2xl">Dashboard</h1>
        <div class="grid grid-cols-2 gap-8">
            <div>
                <div v-for="post in posts">
                    <IndividualPostComponent :post-data="post" />
                </div>
            </div>
            <div>
                <NewpostComponent @new-post-created="getOwnedPostList" />
            </div>
        </div>
    </div>
</template>
Here we use the two components we just created to populate the dashboard.
First when we mount the component we call the getOwnedPostList function in order retrieve all the posts the user has made. Notice the expand: "user" attribute we added to the payload. This is so that PocketBase will automatically nested record relations and thus allow us to retrieve the user data that is related to the profile without needing to do an additional query. Then we have a v-for loop which iterates over all the posts we have retrieved and passes the data to the IndividualPostComponent which takes care of the actual displaying of the post data.
The NewpostComponent is used to render the form a user can use to create a new post. Since we are emitting a signal from the component when a post is created, we use @new-post-created="getOwnedPostList" to catch the signal and fetch all posts again, thus refreshing the list without needing to reload the page.
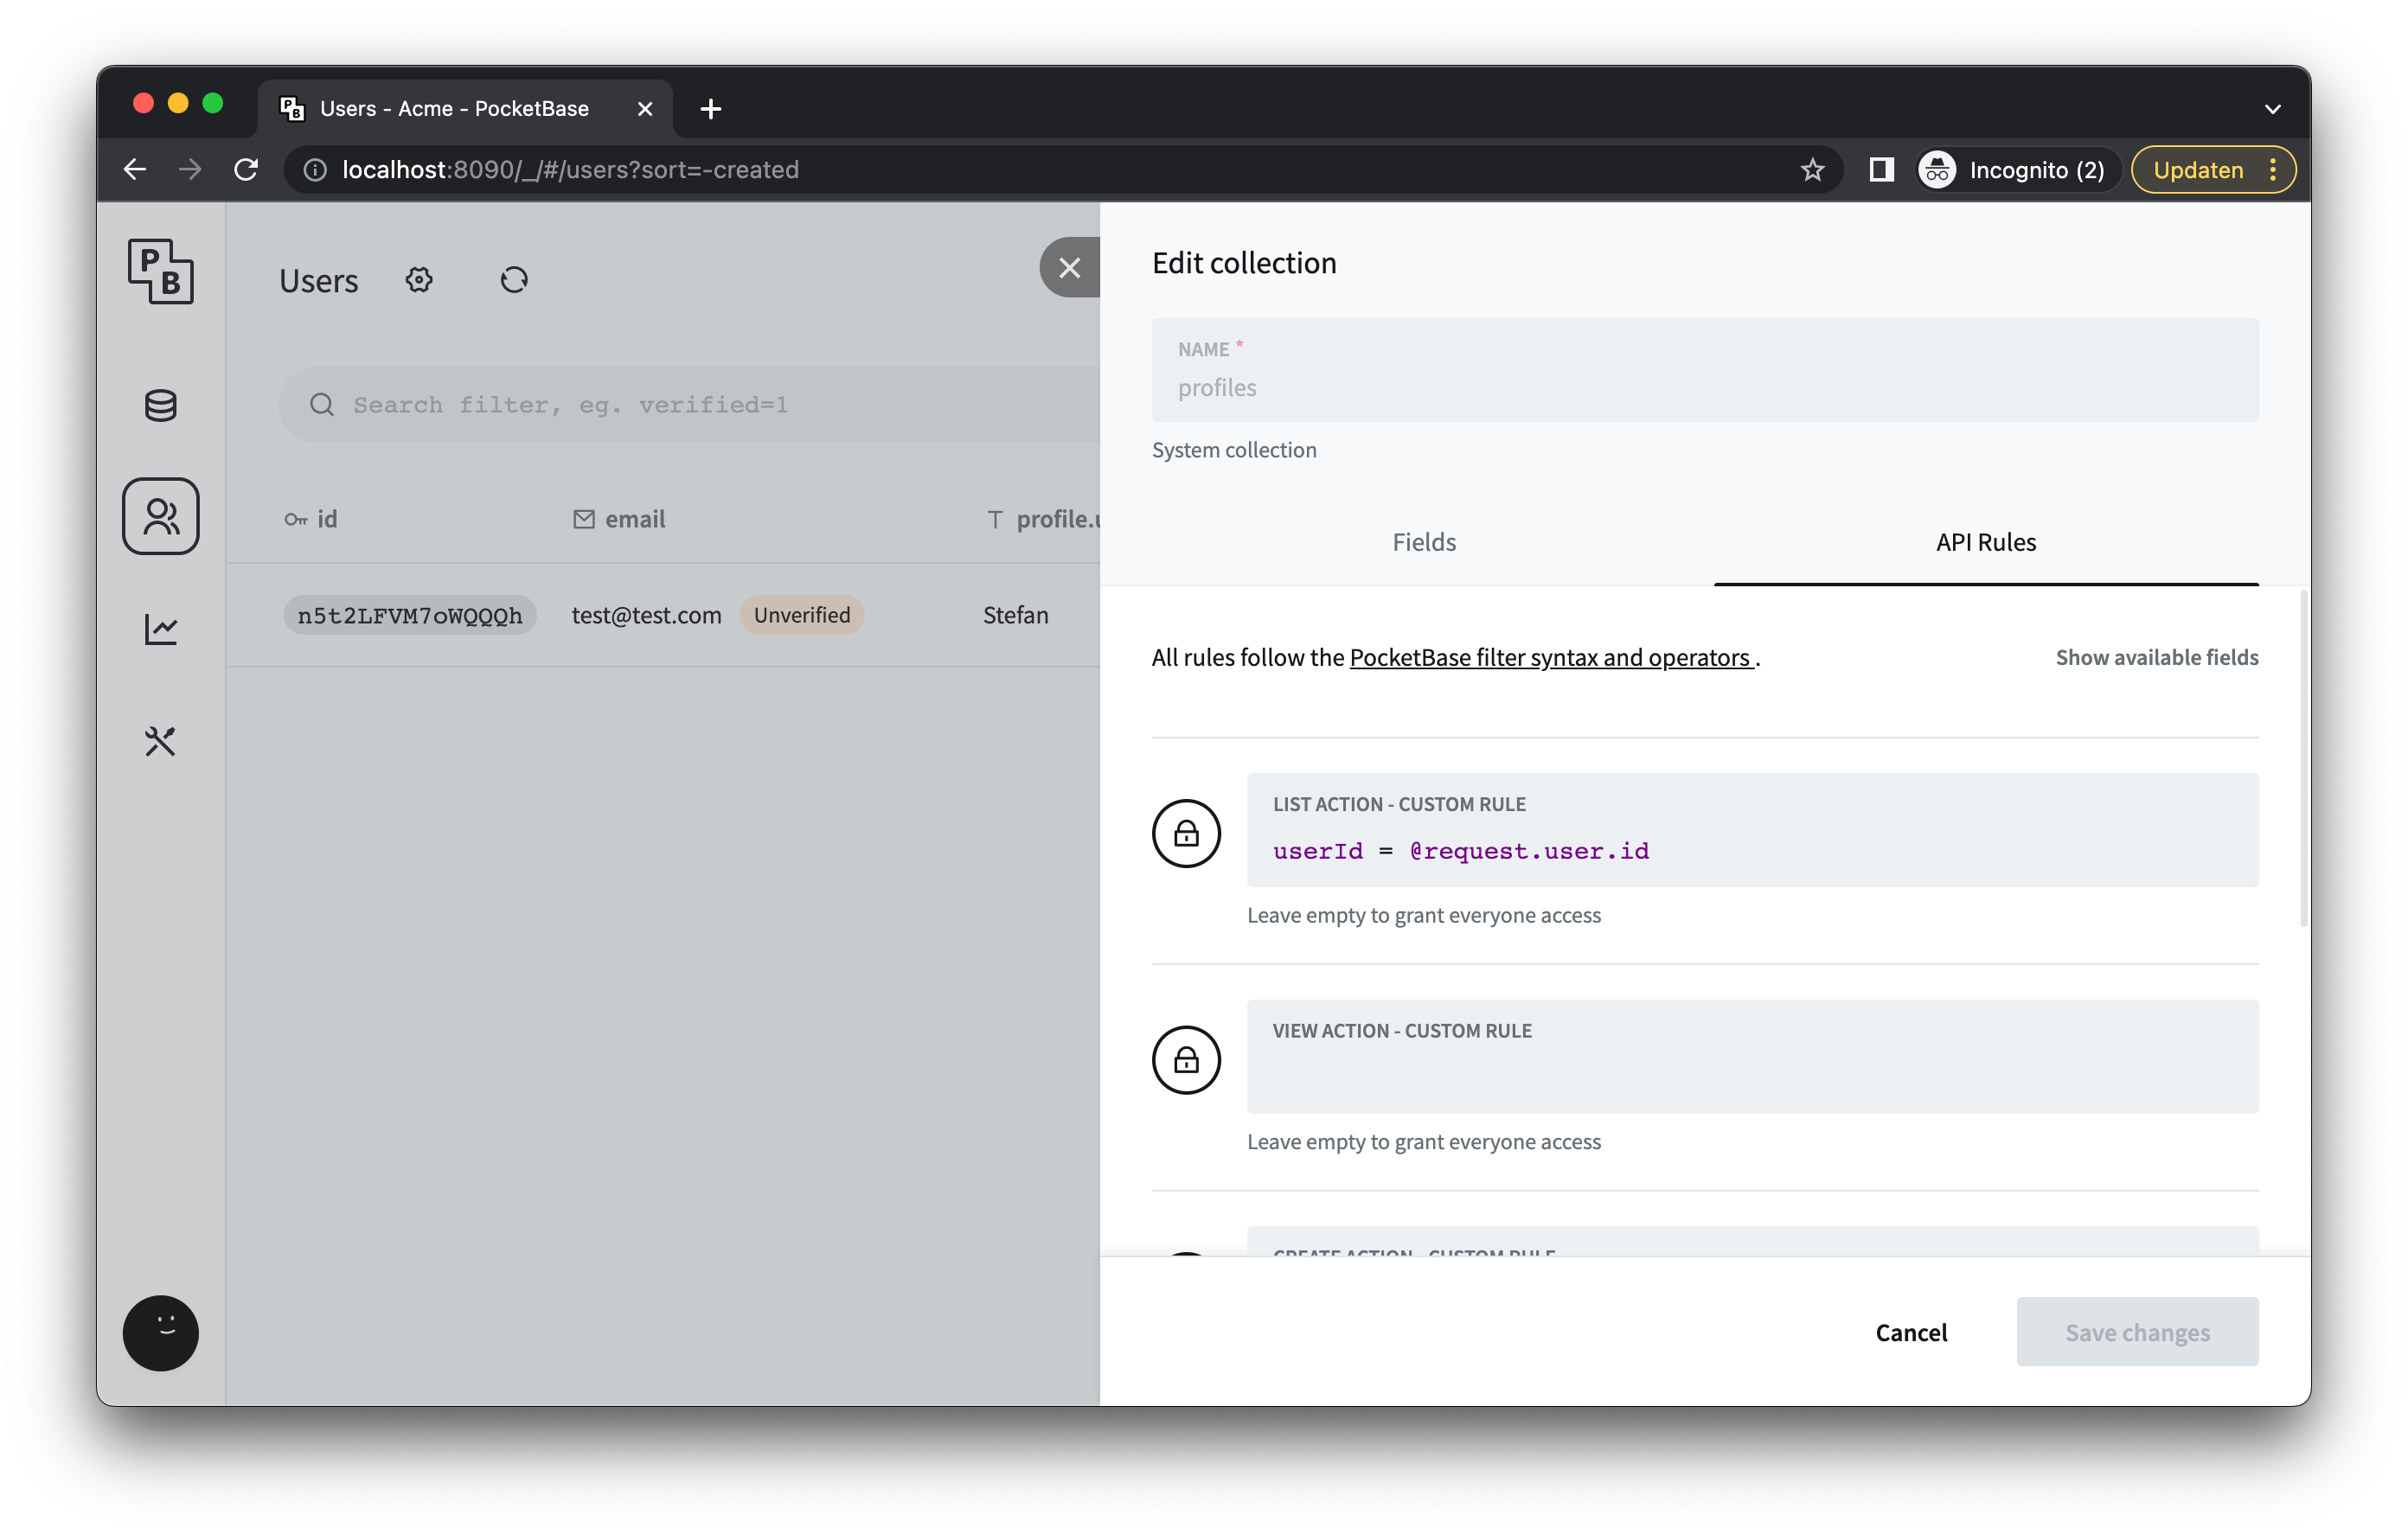
API Rules
One final thing before we can create a post, we need to update the API rules of the user profile so that we can retrieve the user name to display in our posts. What are API rules you might think, well from the documentation:
API Rules are your Collection access permissions and data filters.
Each collection has 5 rules, corresponding to the specific API action:
listRuleviewRulecreateRuleupdateRuledeleteRule
Each rule could be set to:
- "locked" - aka.
null, which means that the action could be performed only by an authorized admin (this is the default) - Empty string - anyone will be able to perform the action (admins, authorized users and guests)
- Non-empty string - only those Record(s) and users (authorized or not) that satisfies the rule filter expression will be able to perform this action
In our case we need to set the viewRule of the user profile to an empty string so that anyone can retrieve the user profile information associated with a post (user name in our case).
Creating your first post
Now when you create a post you should see something like this:
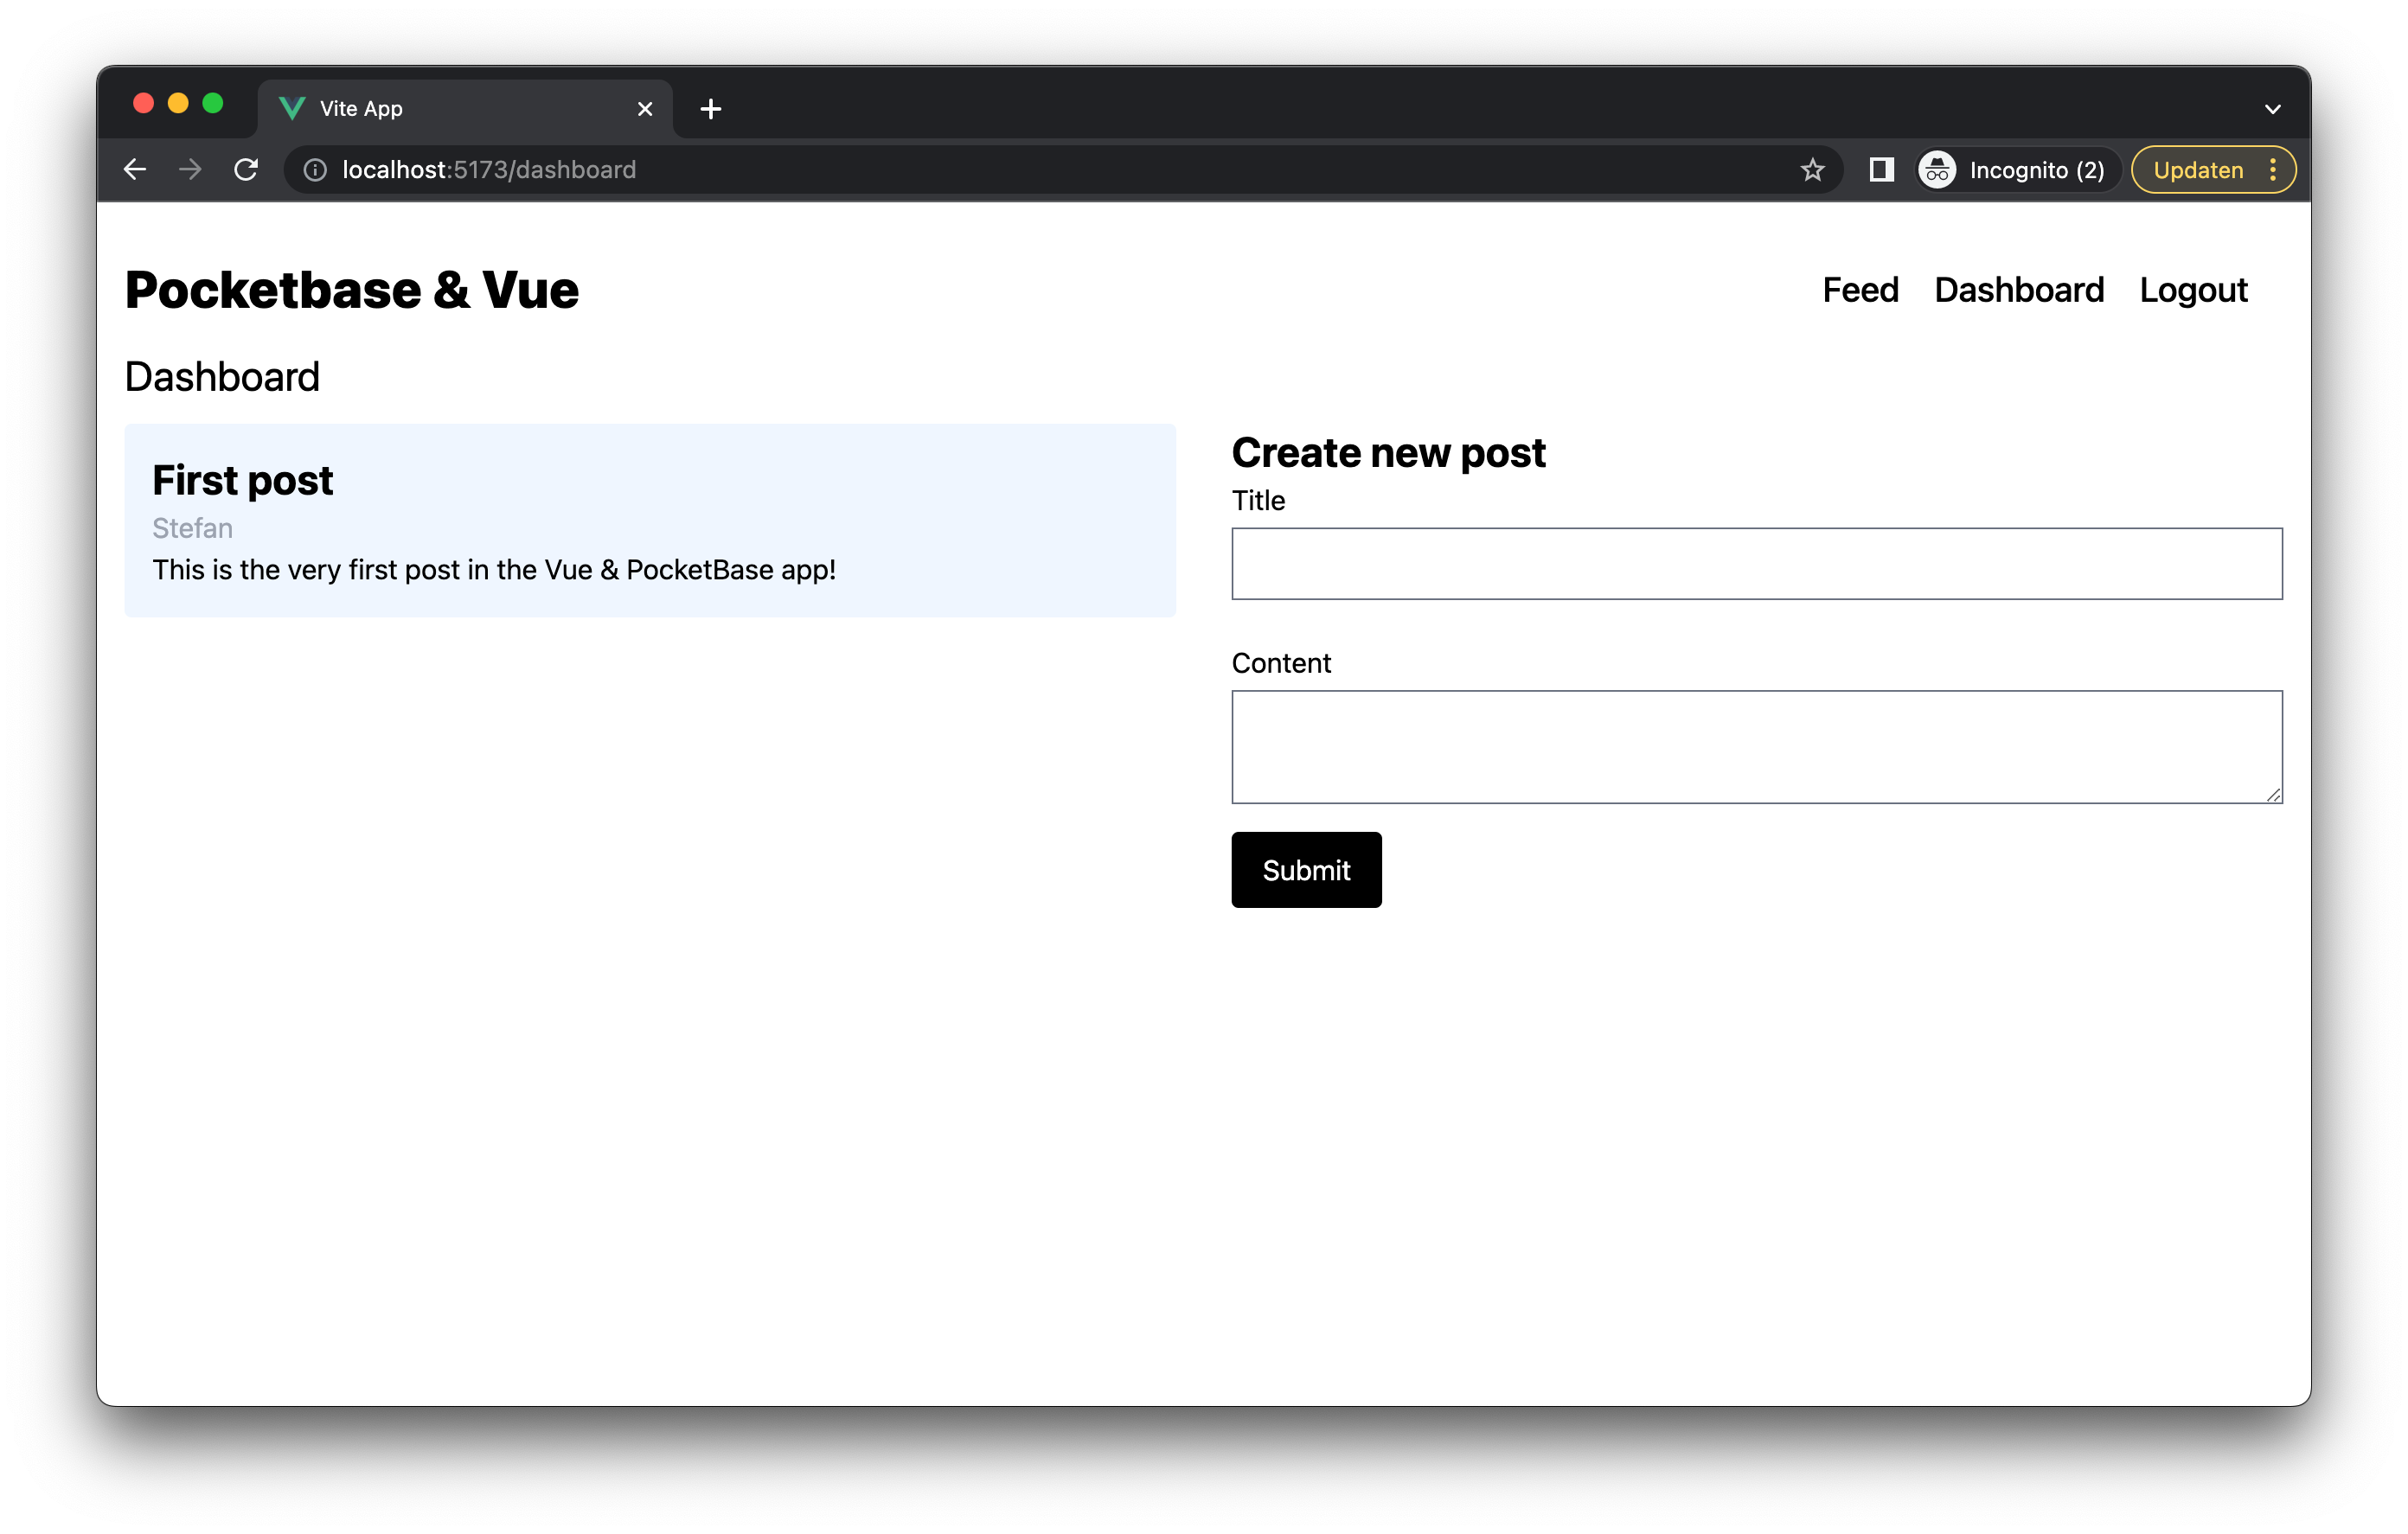
Awesome! Users can now create new posts and see the complete list of all posts they have created.
Creating a realtime feed
Let's add the final piece of the puzzle: A realtime feed of all the posts. The goals is to have as Twitter-like feed which automatically updates as soon as anyone creates a new post. Sounds complicated but luckily PocketBase supports subcribing to either individual rows in the database (individual posts in this case) or to an entire collection (all the posts, which is what we will be using). To start, create a new file called FeedView.vue in the views folder and add the following code:
<script setup lang="ts">
import { pocketBaseSymbol } from "@/symbols/injectionSymbols";
import { inject, onMounted, onUnmounted, ref } from "vue";
import IndividualPostComponent from "../components/IndividualPostComponent.vue";

// Inject the PocketBase client
const $pb = inject(pocketBaseSymbol);

// Local reactive variables
const posts = ref<any[]>([]);

// Get all the user's posts
const getPostList = async () => {
    try {
        const list = await $pb?.collection("posts").getFullList(200, {
            expand: "user"
        });
        if (list) {
            posts.value = list;
        }
    } catch (error) {
        console.log(error);
    }
};

// Subcribe to the posts collection
const subscribeToAllPosts = async () => {
    await $pb?.realtime.subscribe("posts", async function (e) {
        await getPostList();
    });
};

// Unsubscribe fromt he posts collection
const unsubscribeToAllPosts = async () => {
    await $pb?.realtime.unsubscribe("posts");
};

onMounted(async () => {
    await getPostList();
    await subscribeToAllPosts();
});

onUnmounted(async () => {
    await unsubscribeToAllPosts();
});
</script>

<template>
    <div>
        <h1 class="mb-3 text-2xl">Feed</h1>
        <div class="grid grid-cols-3">
            <div v-for="post in posts" class="col-start-2 col-span-1">
                <IndividualPostComponent :post-data="post" />
            </div>
        </div>
    </div>
</template>
As you can see the code is not too complicated. We basically do three things:
First we use the getPostList function to retrieve all the availble posts, these will be rendered as soon as you land on the feed page.
Second we subscribe to the entire Posts collection by using the subscribeToAllPosts function. So now if anyone creates a new post, the getPostList function will be called again in order to update the whole list. Now, this isn't super optimized since we don't really want to fetch all posts, just the new one that was added. I've left this as an exercise for the reader.
Finally, we call the unsubscribeToAllPosts when we leave the page to do some clean-up.
Now, go ahead and start the Vue dev server and the PocketBase server, open two different windows, login with two different users and have one create a new post and the other on the feed page. You should now see the new post immediately at the bottom of the feed!
Conclusion
In this blog post we've looked at PocketBase as an alternative back-end instead of Firebase and Supabase. While the example Vue app we've built is pretty basic, it seems to be a very capable tool for most SaaS applications out there.
The combination of user authorization (including OAuth2 providers), database management, file storage and realtime capabilities make it something worth considering. Especially if you care about owning all the data your user produce and don't mind self-hosting.
If you want to expand on this example app, the code for this project can be found here on GitHub. Or if this blog inspired you and you need someone to work with you on your next PocketBase based project, you can contact us here: Contact